
Achieving spotless windows is essential for enhancing the appearance of any property. This article explores the essential tools, particularly brushes and poles, and offers expert techniques to ensure effective cleaning results.

Choosing the Right Tools for the Job
A. Types of Brushes
When it comes to window cleaning, selecting the appropriate brush is crucial. Here are some common types:
- Soft-Bristle Brushes: Ideal for delicate glass surfaces, such as antique windows or stained glass. They gently lift dirt without scratching, preserving the glass’s integrity.
- Scrub Brushes: These are perfect for tackling tough, built-up grime on exterior windows. Think of windows exposed to the elements, where dirt hardens over time. The firm bristles effectively break down stubborn debris.
- Microfiber Brushes: Versatile and perfect for regular maintenance. They’re great for large glass surfaces like sliding doors or commercial windows, trapping dust and dirt while being gentle enough to avoid scratches.
B. Poles for High Reach
For those hard-to-reach windows, poles are indispensable. Here are the main types:
- Traditional Extension Poles: These are indispensable for safely reaching high windows, such as those on second-story residential homes. Their lightweight and adjustable design allows for precise control and easy maneuverability, eliminating the need for ladders while ensuring every spot is thoroughly cleaned.
- Water-Fed Poles: Ideal for large-scale projects like commercial buildings with multiple stories. They feature a built-in system that delivers purified water directly to the cleaning brush, effectively removing dirt and grime without the use of chemicals. This setup ensures streak-free results and allows cleaners to work efficiently from the ground, making it perfect for expansive glass facades and hard-to-reach windows.
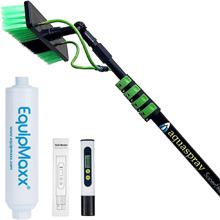
Cleaning Brush & Pole +
Inline Water Filter

Starter Brush & Squeegee
with Extension Pole
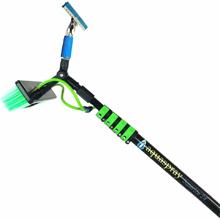
Scrubber Brush, Spray
& Pole
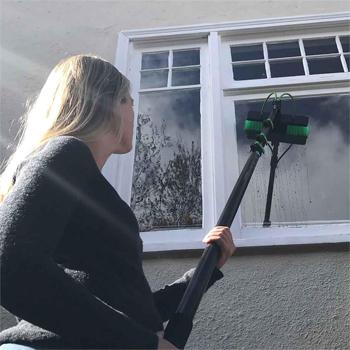
1. Equipmaxx 24 Foot Window Cleaning Brush & Pole with Inline Water Filter
What I Like:
- Inline water filter for streak-free cleaning
- Long reach for high windows/solar panels
- Efficient cleaning performance
What I Don’t Like:
- Frequent filter maintenance
- Pole flexes when fully extended
- Hose connection issues
2. Igadpole Window Washing Cleaner Equipment Kit

What I Like:
- Versatile with multiple cleaning tools
- Built-in soap dispenser
- Effective extension pole
What I Don’t Like:
- Attachment stability issues
- Soap dispenser leakage
- Mixed build quality
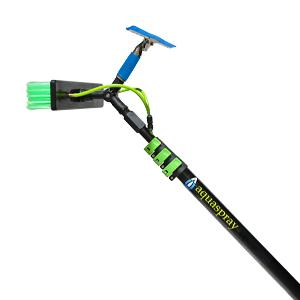
3. Equipmaxx 24 Feet Reach Window Cleaning Brush & Pole Kit
What I Like:
- Long reach (24 feet) for high windows/solar panels
- Comprehensive kit with squeegee and brush
- Easy assembly and use
What I Don’t Like:
- Heavy when fully extended
- Inconsistent water flow
- Durability concerns with plastic connectors
Pros & Cons of Using a Brush VS a Squeegee:
Using a brush and pole versus a squeegee for window cleaning both have their unique advantages and challenges, depending on the situation. Here’s a breakdown:
Pros of Using a Brush and Pole:
- Reach: A brush and pole setup is excellent for reaching high or hard-to-access windows without needing a ladder, making it ideal for tall buildings or awkwardly placed windows.
- Thorough Cleaning: Brushes can scrub away dirt, grime, and debris effectively, especially on windows that haven’t been cleaned in a while or have stubborn buildup.
- Versatility: Brushes can be used on a variety of surfaces, including frames and sills, providing a more comprehensive clean.
Cons of Using a Brush and Pole:
- Potential for Streaks: Without proper rinsing or if not used with purified water, brushes can leave streaks, especially if soap residue isn’t fully removed.
- More Water Needed: This method often requires more water to rinse off the dirt and soap, which can be less efficient compared to using a squeegee.
- Physical Effort: Using a brush on a pole, especially for extended periods or on large surfaces, can be physically demanding.
Pros of Using a Squeegee:
- Streak-Free Finish: Squeegees are designed to remove water and soap from glass surfaces efficiently, leaving a streak-free finish with minimal effort.
- Speed: Once the glass is prepped, squeegees allow for quick removal of water, speeding up the cleaning process, especially on large, flat surfaces.
- Less Water Usage: Squeegees require less water since there’s no need for extensive rinsing, making them more eco-friendly and efficient.
Cons of Using a Squeegee:
- Limited Reach: Without an extension, squeegees are limited to the height you can physically reach, which might require ladders or scaffolding for higher windows.
- Less Effective on Heavy Dirt: Squeegees are not as effective at removing heavy grime or debris. Pre-cleaning with a brush might be necessary, adding an extra step to the process.
- Skill Required: Proper squeegee technique requires practice. Incorrect usage can lead to streaks or missed spots, particularly on larger windows.
Comparison Chart:
| Feature | Brush and Pole | Squeegee |
|---|---|---|
| Reach | Excellent for high or hard-to-reach areas | Limited without an extension |
| Cleaning Power | Effective on heavy dirt and grime | Less effective; may require pre-cleaning |
| Finish | Can leave streaks if not rinsed properly | Typically leaves a streak-free finish |
| Water Usage | Requires more water for rinsing | Uses less water |
| Ease of Use | Physically demanding for large areas | Faster but requires proper technique |
| Versatility | Can clean multiple surfaces | Primarily for glass surfaces |
Each method has its place in window cleaning, and often, a combination of both tools provides the best results, depending on the specific cleaning needs of the job.
Effective Cleaning Techniques
Preparation Steps
Before starting the cleaning process, gather all necessary tools and materials. This includes brushes, poles, squeegees and appropriate cleaning solutions.
Step-by-Step Cleaning Process
- Begin at the Top: Start cleaning at the top of the window and work your way down. This approach prevents dirty water from dripping onto areas you’ve already cleaned, ensuring a streak-free finish.
- Select the Right Brush: Choose the appropriate brush based on the glass surface. For example, use a soft-bristle brush for delicate glass like stained windows to lift dirt without causing scratches.
- Thorough Rinsing: After scrubbing, always rinse the window with clean water. This step is crucial to remove any remaining soap residue, which can lead to streaks if left behind.
- Master the Squeegee: Proper squeegee technique is key. Start at the top of the window and pull the squeegee down in a straight line. After each pass, wipe the blade to avoid leaving streaks and ensure a flawless result.
Choosing the Right Cleaning Solutions
Different glass types may require specific cleaning solutions. Here’s a quick reference table:
| Glass Type | Recommended Cleaning Solution |
|---|---|
| Tempered Glass | Gentle soap solution |
| Low-E Glass | pH-neutral cleaner |
| Frosted Glass | Vinegar and water solution |
Avoiding Common Mistakes
To ensure the best results, be mindful of these common pitfalls:
- Avoid Harsh Chemicals: Using abrasive cleaners can damage glass surfaces. Opt for gentle, effective solutions instead.
- Don’t Neglect Frames: Always clean window frames first to prevent dirt from dripping onto clean glass.
- Use the Correct Brush Attachment: Ensure you are using the appropriate brush for the job to maximize cleaning efficiency.
The Bottom Line:
Achieving spotless windows is all about using the right techniques and tools. By starting at the top and working your way down, you avoid unsightly drips on already-cleaned areas. Selecting the correct brush for the specific glass surface ensures that you clean effectively without risking damage, while thorough rinsing helps eliminate any residue that could cause streaks.
Finally, mastering the squeegee technique—starting from the top and wiping the blade after each pass—guarantees a flawless finish. With these methods, you can maintain pristine windows that enhance the appearance of any property.
Last Updated August 20, 2024